How to add Smartproxy in ixBrowser (Free Trial)
What is Smartproxy?Smartproxy is a quality proxy service provider that presents an exceptional proxy service suitable for both residential and business applications. Smartproxy residential proxies are currently at 40% off using the code RESI40.
Distinguished by its wealth of features, this proxy service boasts an impressive network of 195 data centers spanning 8 global cities. This extensive coverage provides access to a vast pool of over 65 million IPs, empowering seamless interaction with geo-restricted services. The service also accommodates concurrent proxy connections, enhancing flexibility.
Smartproxy excels in furnishing robust and dependable residential proxies. These IPs are linked to tangible devices like computers and smparphones, allowing internet service providers to perceive them as genuine visitors. Consequently, the likelihood of encountering blocks or restrictions is significantly diminished.
Set up Smartproxy's proxies with ixBrowser
To get things going, download the ixBrowser from the website. After the download is finished, open the app and create an account. You won't take long getting comfortable with ixBrowser, as the interface is simple, and all the features are easy to use. Plus, you can watch step-by-step video tutorials for pretty much every feature this anti-detect browser offers.
Now, let's start integrating proxies with ixBrowser!
Integration with residential proxies
In just a few quick steps, start the proxies integration with ixBrowser:
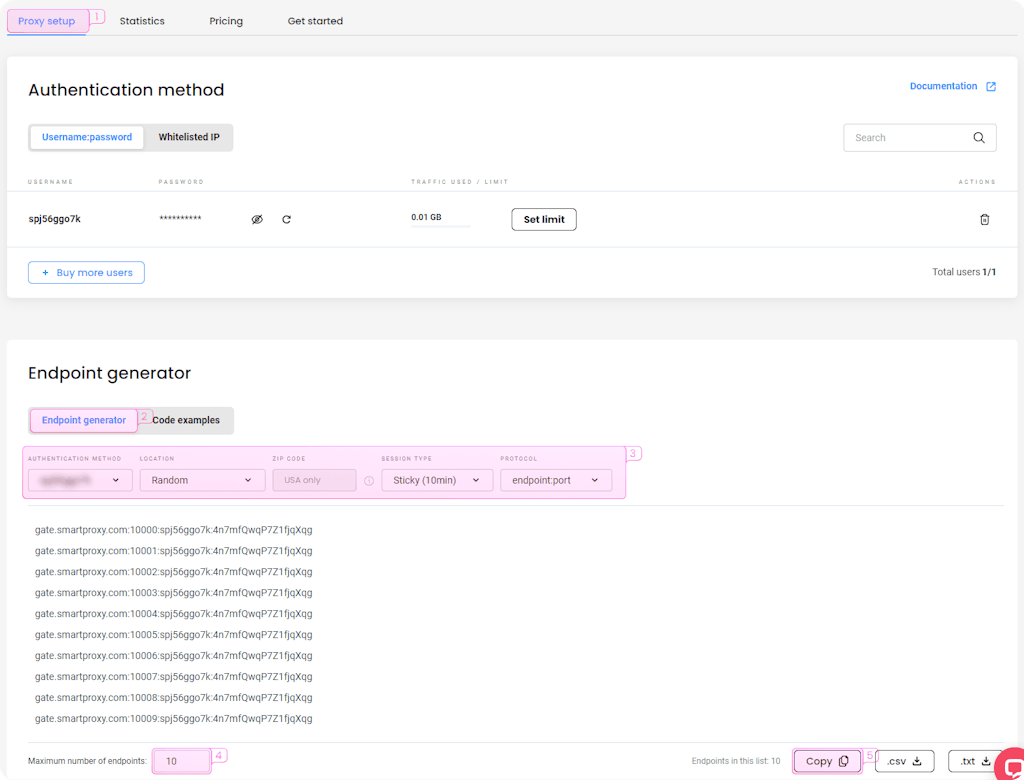
1.Visit Smartproxy website and open the proxy set tab.
2.Navigate to the Endpoint gengerator.
3.Configure the parameters. Set your authentication method, location, and session type.
4.Select the number of proxy endpoints you want to generate (default - 10).
5.Copy the endpoints.
Integration with datacenter proxies
To integrate ixBrowser with Smartproxy datacenter proxies, follow these steps:
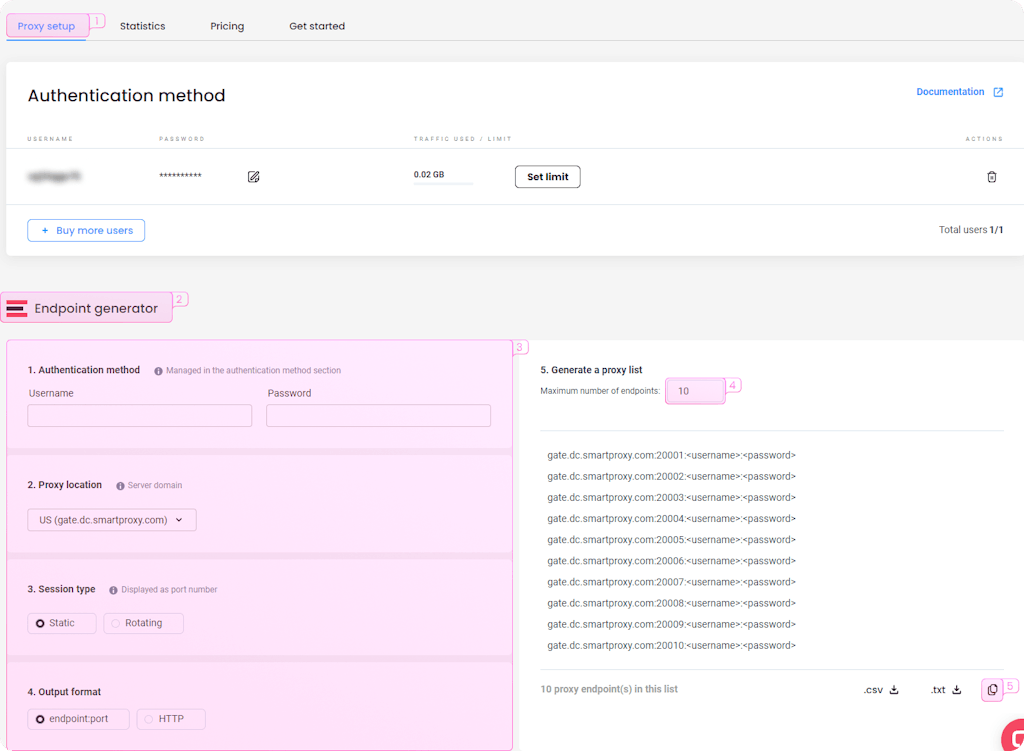
1.Open the proxy setup tab.
2.Navigate to the Endpoint generator.
3.Condigure the parameters according to your needs. Enter your credentials for the authentication method, and set a location and session type.
4.Select the number of proxy endpoints you want to generate (default - 10).
5.Copy the endpoints.
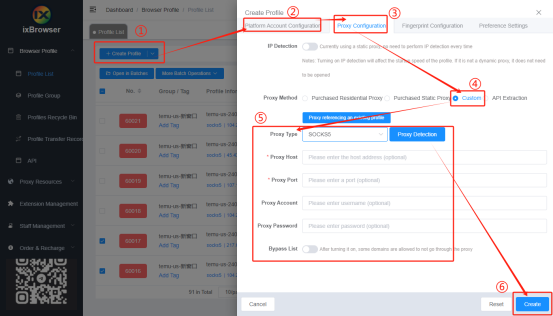
1.In the main window, click the Create Profile button.
2.Choose the platform, group, and profile title, then click the Next step button.
3.In the proxy configuration tab, set the proxy method to Custom and choose the supported proxy type.
4.Once you have purchased the residential or datacenter proxy plan from Smartproxy, copy the proxy information to integrate the proxies directly into the browser profile. Once you've entered the proxy details, hit Create.
5/After creating the profile with the proxy settings, click Open, and ixBrowser will start a session with the masked IP address.
Smartproxy residential proxies are currently at 40% off using the code RESI40


